

지식
Next.js
E2E 테스트 — Playwright로 전체 흐름 검증하기
Next.js 프로젝트에 Playwright를 설정하고 로그인 플로, 폼 제출, API 모킹, 인증 상태 저장 등 실전 E2E 테스트 패턴을 작성하는 방법을 설명합니다.
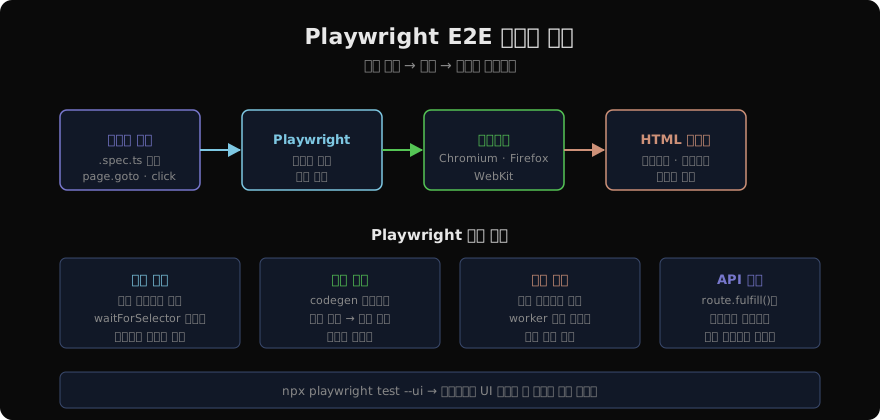
지난 글에서 Jest와 React Testing Library로 단위·통합 테스트를 작성하는 방법을 살펴봤다. 이번 글은 E2E(End-to-End) 테스트다. 실제 브라우저에서 사용자의 전체 행동 흐름을 검증하는 Playwright를 다룬다. Next.js 팀도 공식적으로 Playwright를 권장한다.
Playwright 설치
npm init playwright@latest설치 마법사가 playwright.config.ts, tests/ 폴더, GitHub Actions 워크플로 파일 등을 자동 생성한다. 브라우저(Chromium, Firefox, WebKit)도 함께 설치된다.
# 브라우저만 따로 설치할 때
npx playwright install
playwright.config.ts 설정
// playwright.config.ts
import { defineConfig, devices } from '@playwright/test'

export default defineConfig({
  testDir: './tests',
  fullyParallel: true,          // 테스트 병렬 실행
  retries: process.env.CI ? 2 : 0, // CI에서 실패 시 2회 재시도
  workers: process.env.CI ? 1 : undefined,
  reporter: 'html',

  use: {
    baseURL: 'http://localhost:3000',
    trace: 'on-first-retry',   // 실패 시 트레이스 저장
    screenshot: 'only-on-failure', // 실패 시 스크린샷
    video: 'retain-on-failure',    // 실패 시 비디오
  },

  projects: [
    { name: 'chromium', use: { ...devices['Desktop Chrome'] } },
    { name: 'firefox', use: { ...devices['Desktop Firefox'] } },
    { name: 'webkit', use: { ...devices['Desktop Safari'] } },
    // 모바일 테스트
    { name: 'Mobile Chrome', use: { ...devices['Pixel 5'] } },
  ],

  // 테스트 실행 전 개발 서버 자동 시작
  webServer: {
    command: 'npm run dev',
    url: 'http://localhost:3000',
    reuseExistingServer: !process.env.CI,
  },
})
기본 테스트 작성
// tests/home.spec.ts
import { test, expect } from '@playwright/test'

test.describe('홈페이지', () => {
  test('제목이 표시된다', async ({ page }) => {
    await page.goto('/')

    await expect(page).toHaveTitle(/My App/)
    await expect(page.getByRole('heading', { level: 1 })).toBeVisible()
  })

  test('내비게이션 링크가 동작한다', async ({ page }) => {
    await page.goto('/')

    await page.getByRole('link', { name: '소개' }).click()

    await expect(page).toHaveURL('/about')
    await expect(page.getByText('회사 소개')).toBeVisible()
  })
})
Playwright의 expect는 자동 대기(Auto-waiting)를 지원한다. 요소가 아직 없어도 기본 5초간 나타날 때까지 기다린다. 별도의 waitFor* 호출이 거의 필요 없다.
로그인 플로 테스트
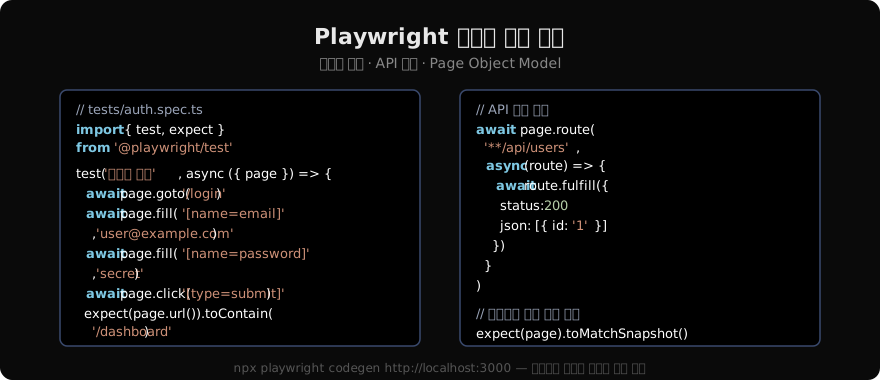
// tests/auth.spec.ts
import { test, expect } from '@playwright/test'

test.describe('인증', () => {
  test('올바른 자격증명으로 로그인한다', async ({ page }) => {
    await page.goto('/login')

    await page.getByLabel('이메일').fill('user@example.com')
    await page.getByLabel('비밀번호').fill('password123')
    await page.getByRole('button', { name: '로그인' }).click()

    await expect(page).toHaveURL('/dashboard')
    await expect(page.getByText('환영합니다')).toBeVisible()
  })

  test('잘못된 비밀번호로 오류 메시지가 표시된다', async ({ page }) => {
    await page.goto('/login')

    await page.getByLabel('이메일').fill('user@example.com')
    await page.getByLabel('비밀번호').fill('wrongpassword')
    await page.getByRole('button', { name: '로그인' }).click()

    await expect(page.getByRole('alert')).toContainText('이메일 또는 비밀번호가 올바르지 않습니다')
    await expect(page).toHaveURL('/login') // URL 변경 없음
  })
})
인증 상태 재사용 (storageState)
매 테스트마다 로그인하면 느리다. 한 번 로그인한 쿠키/스토리지를 저장해두고 재사용한다.
// tests/auth.setup.ts
import { test as setup, expect } from '@playwright/test'
import path from 'path'

const authFile = path.join(__dirname, '../.auth/user.json')

setup('로그인 상태 저장', async ({ page }) => {
  await page.goto('/login')
  await page.getByLabel('이메일').fill('user@example.com')
  await page.getByLabel('비밀번호').fill('password123')
  await page.getByRole('button', { name: '로그인' }).click()

  await expect(page).toHaveURL('/dashboard')

  // 쿠키와 localStorage 저장
  await page.context().storageState({ path: authFile })
})
// playwright.config.ts
export default defineConfig({
projects: [
{
name: 'setup',
testMatch: /.*\.setup\.ts/,
},
{
name: 'authenticated',
testDir: './tests',
use: {
storageState: '.auth/user.json', // 저장된 인증 상태 사용
},
dependencies: ['setup'], // setup 먼저 실행
},
],
})API 모킹
외부 API에 의존하지 않고 일정한 결과를 테스트하려면 네트워크 요청을 가로채 모킹한다.
test('사용자 목록을 표시한다', async ({ page }) => {
  // /api/users 요청을 가로채 모킹
  await page.route('**/api/users', async (route) => {
    await route.fulfill({
      status: 200,
      contentType: 'application/json',
      body: JSON.stringify([
        { id: '1', name: '김철수', email: 'kim@example.com' },
        { id: '2', name: '이영희', email: 'lee@example.com' },
      ]),
    })
  })

  await page.goto('/users')

  await expect(page.getByText('김철수')).toBeVisible()
  await expect(page.getByText('이영희')).toBeVisible()
})
Page Object Model (POM)
테스트가 많아지면 같은 셀렉터가 여러 파일에 중복된다. POM 패턴으로 캡슐화한다.
// tests/pages/LoginPage.ts
import { type Page, type Locator } from '@playwright/test'

export class LoginPage {
  readonly page: Page
  readonly emailInput: Locator
  readonly passwordInput: Locator
  readonly submitButton: Locator
  readonly errorMessage: Locator

  constructor(page: Page) {
    this.page = page
    this.emailInput = page.getByLabel('이메일')
    this.passwordInput = page.getByLabel('비밀번호')
    this.submitButton = page.getByRole('button', { name: '로그인' })
    this.errorMessage = page.getByRole('alert')
  }

  async goto() {
    await this.page.goto('/login')
  }

  async login(email: string, password: string) {
    await this.emailInput.fill(email)
    await this.passwordInput.fill(password)
    await this.submitButton.click()
  }
}
// tests/auth.spec.ts (POM 사용)
import { test, expect } from '@playwright/test'
import { LoginPage } from './pages/LoginPage'
test('로그인', async ({ page }) => {
const loginPage = new LoginPage(page)
await loginPage.goto()
await loginPage.login('user@example.com', 'password123')
await expect(page).toHaveURL('/dashboard')
})CI 연동
# .github/workflows/playwright.yml
name: Playwright Tests

on:
  push:
    branches: [main]
  pull_request:
    branches: [main]

jobs:
  test:
    runs-on: ubuntu-latest
    steps:
      - uses: actions/checkout@v4
      - uses: actions/setup-node@v4
        with:
          node-version: 20

      - name: Install dependencies
        run: npm ci

      - name: Install Playwright Browsers
        run: npx playwright install --with-deps

      - name: Run Playwright tests
        run: npx playwright test

      - uses: actions/upload-artifact@v4
        if: always()
        with:
          name: playwright-report
          path: playwright-report/
          retention-days: 30
지난 글: 테스팅 — Jest와 React Testing Library로 단위 테스트 작성하기
읽어주셔서 감사합니다. 😊
PALDYN / ARTICLE AI
글의 개념, 수식, 코드에 대해 물어보세요.
질문과 관련된 문단을 골라 답변의 문맥으로 사용합니다.생각 중 · 0초