

useFormStatus — 폼 상태를 자식 컴포넌트에서 읽기
useFormStatus의 반환 객체(pending, data, method, action), 사용 위치 규칙, 제출 버튼 패턴, data 필드를 활용한 낙관적 UI를 설명합니다.
지난 글에서 useOptimistic으로 낙관적 업데이트를 구현하는 방법을 살펴봤다. React 19의 Actions를 사용할 때 가장 자주 필요한 작업은 “제출 중” 상태를 버튼에 반영하는 것이다. 이를 위해 useFormStatus가 있다.
useFormStatus란?
useFormStatus는 가장 가까운 부모 <form>의 상태를 읽는 훅이다. react-dom 패키지에서 import한다.
import { useFormStatus } from 'react-dom';

const { pending, data, method, action } = useFormStatus();
반환 객체의 네 가지 필드:
pending—boolean. 폼의 Action이 실행 중이면truedata—FormData | null. 제출 중인 폼 데이터method—'get' | 'post'. HTTP 메서드action— Action 함수 참조
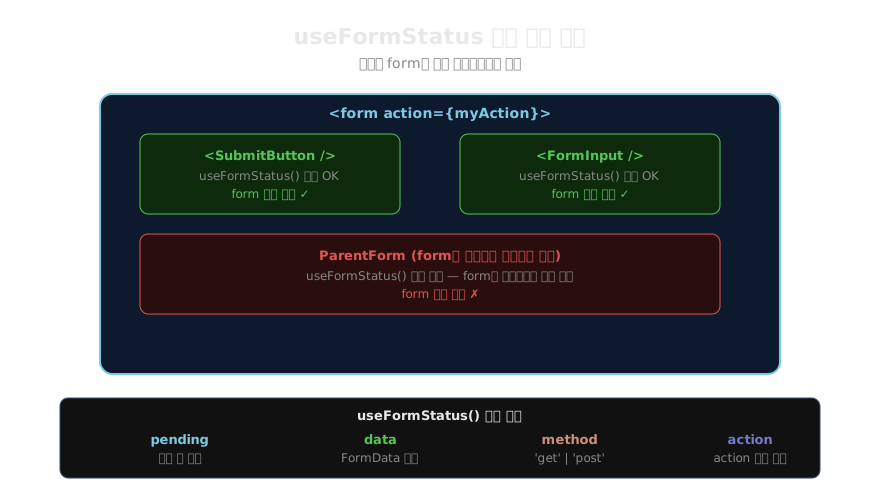
핵심 규칙: form 안의 자식 컴포넌트에서만 사용
useFormStatus는 반드시 <form> 요소의 자식 컴포넌트 안에서 호출해야 한다. 폼을 직접 렌더링하는 컴포넌트에서는 상태를 읽을 수 없다.
// 잘못된 사용: form을 포함하는 컴포넌트에서 직접 호출
function MyForm() {
  const { pending } = useFormStatus(); // ❌ form의 부모이므로 항상 pending=false
  return (
    <form action={myAction}>
      <button disabled={pending}>저장</button>
    </form>
  );
}

// 올바른 사용: 자식 컴포넌트로 분리
function SubmitButton() {
  const { pending } = useFormStatus(); // ✅ form 안에서 호출
  return <button type="submit" disabled={pending}>저장</button>;
}

function MyForm() {
  return (
    <form action={myAction}>
      <SubmitButton /> {/* form 안에 포함 */}
    </form>
  );
}
실전 패턴들
제출 버튼 패턴 — 가장 기본적인 사용법이다.
import { useFormStatus } from 'react-dom';

function SubmitButton({ label = '저장' }: { label?: string }) {
  const { pending } = useFormStatus();
  return (
    <button
      type="submit"
      disabled={pending}
      className={pending ? 'opacity-50 cursor-not-allowed' : ''}
    >
      {pending ? (
        <>
          <span className="spinner" /> 처리 중...
        </>
      ) : (
        label
      )}
    </button>
  );
}
이 컴포넌트는 어떤 폼에도 재사용할 수 있다.
폼 전체 비활성화 — 제출 중 모든 입력을 막을 때 유용하다.
function FormField({ name, label }: { name: string; label: string }) {
  const { pending } = useFormStatus();
  return (
    <label>
      {label}
      <input name={name} disabled={pending} />
    </label>
  );
}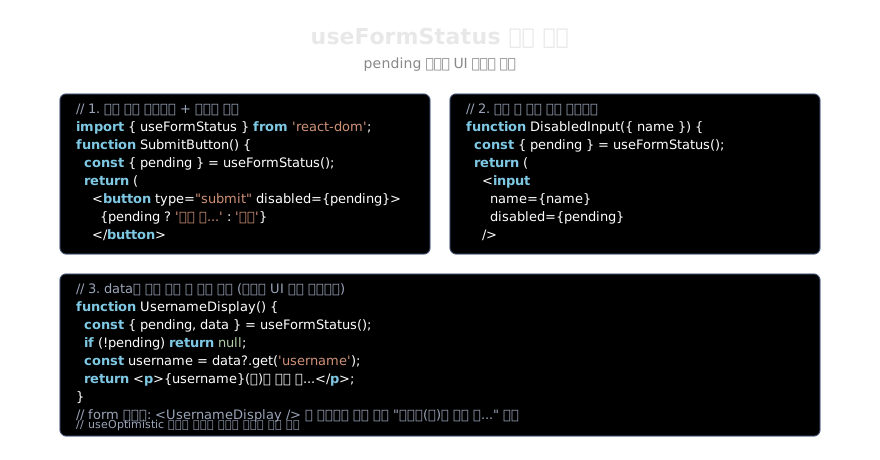
data 필드로 간단한 낙관적 피드백
useOptimistic 없이도 data 필드를 활용하면 제출 중인 값을 미리 보여줄 수 있다.
function CurrentUsername({ current }: { current: string }) {
  const { pending, data } = useFormStatus();

  // 제출 중이면 입력한 새 이름을 미리 표시
  const displayName = pending
    ? (data?.get('username') as string) || current
    : current;

  return (
    <p>
      현재 이름:{' '}
      <strong style={{ opacity: pending ? 0.6 : 1 }}>
        {displayName}
        {pending && ' (변경 중...)'}
      </strong>
    </p>
  );
}

function UpdateNameForm({ currentName }: { currentName: string }) {
  async function updateName(formData: FormData) {
    await saveUsername(formData.get('username') as string);
  }

  return (
    <form action={updateName}>
      <CurrentUsername current={currentName} />
      <input name="username" defaultValue={currentName} />
      <SubmitButton label="이름 변경" />
    </form>
  );
}
useActionState의 isPending과 차이
비슷한 역할을 하는 useActionState의 세 번째 반환값 isPending과 어떻게 다를까?
useFormStatus().pending | useActionState()[2] | |
|---|---|---|
| 위치 | 폼의 자식 컴포넌트 | 폼을 렌더링하는 컴포넌트 |
| 범위 | 가장 가까운 부모 form | 해당 useActionState 훅의 action |
| 추가 정보 | data, method, action | 없음 |
| 재사용성 | 높음 (제네릭 SubmitButton) | 낮음 (특정 action에 묶임) |
보통은 두 가지를 함께 사용한다. 폼 컴포넌트에서 useActionState로 상태를 관리하고, 제출 버튼 같은 재사용 컴포넌트에서 useFormStatus로 pending을 읽는 패턴이다.
완전한 통합 예제
import { useActionState } from 'react';
import { useFormStatus } from 'react-dom';

// 재사용 가능한 버튼 컴포넌트
function SubmitButton() {
  const { pending } = useFormStatus();
  return (
    <button type="submit" disabled={pending}>
      {pending ? '저장 중...' : '저장'}
    </button>
  );
}

// 폼 컴포넌트
function ProfileForm({ profile }: { profile: Profile }) {
  const [state, formAction, isPending] = useActionState(updateProfile, {
    error: null,
    success: false,
  });

  if (state.success) return <p>프로필이 업데이트됐습니다!</p>;

  return (
    <form action={formAction}>
      <input name="name" defaultValue={profile.name} />
      <input name="bio" defaultValue={profile.bio} />
      {state.error && <p className="error">{state.error}</p>}
      <SubmitButton /> {/* useFormStatus를 내부에서 사용 */}
    </form>
  );
}useFormStatus는 단순하지만 강력하다. 재사용 가능한 폼 UI 컴포넌트를 만들 때 핵심적인 역할을 한다. 다음 글에서는 React 19에서 변경된 ref의 새로운 사용 방식을 살펴본다.
지난 글: useOptimistic으로 낙관적 UI 업데이트 구현하기
다음 글: ref를 Props로 전달하기 — forwardRef 없이 ref 넘기기
읽어주셔서 감사합니다. 😊
PALDYN / ARTICLE AI
글의 개념, 수식, 코드에 대해 물어보세요.
질문과 관련된 문단을 골라 답변의 문맥으로 사용합니다.생각 중 · 0초