

useActionState로 Action 결과 상태 관리하기
useActionState의 시그니처, prevState를 활용한 누적 처리, 유효성 검사 에러 표시, pending 상태 통합 패턴을 설명합니다.
지난 글에서 React 19 Actions의 기본 개념을 살펴봤다. Action이 성공했는지 실패했는지, 에러 메시지를 어떻게 표시할지를 관리하려면 별도의 상태가 필요하다. 이를 위해 만들어진 것이 useActionState다.
useActionState란?
useActionState는 Action의 반환값을 상태로 관리해주는 훅이다. 이전에는 useFormState라는 이름이었지만 React 19에서 useActionState로 변경됐다.
import { useActionState } from 'react';

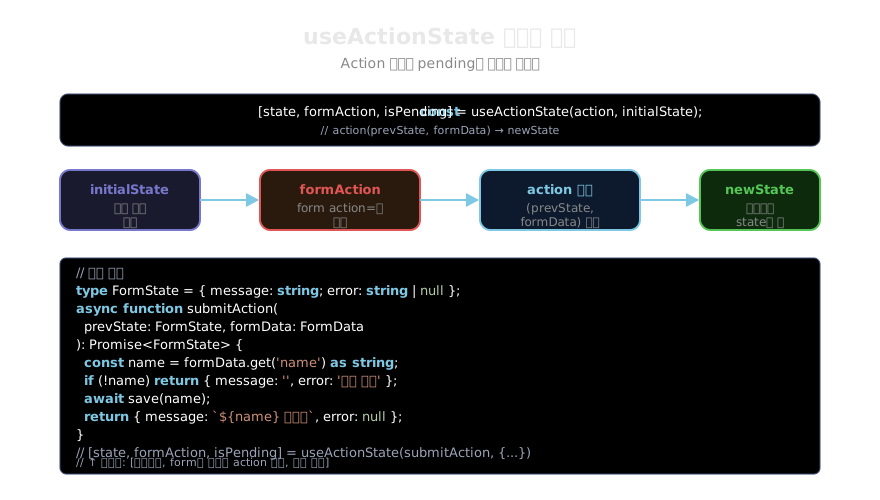
const [state, formAction, isPending] = useActionState(action, initialState);action—(prevState, formData) => newState형태의 함수initialState— 초기 상태 (첫 렌더 시state의 값)- 반환값:
[현재 상태, form에 전달할 action 래퍼, 진행 여부]
가장 중요한 차이는 action 함수의 첫 번째 인자로 prevState가 추가된다는 점이다. Action이 실행될 때마다 이전 상태를 참조할 수 있다.
기본 사용 패턴
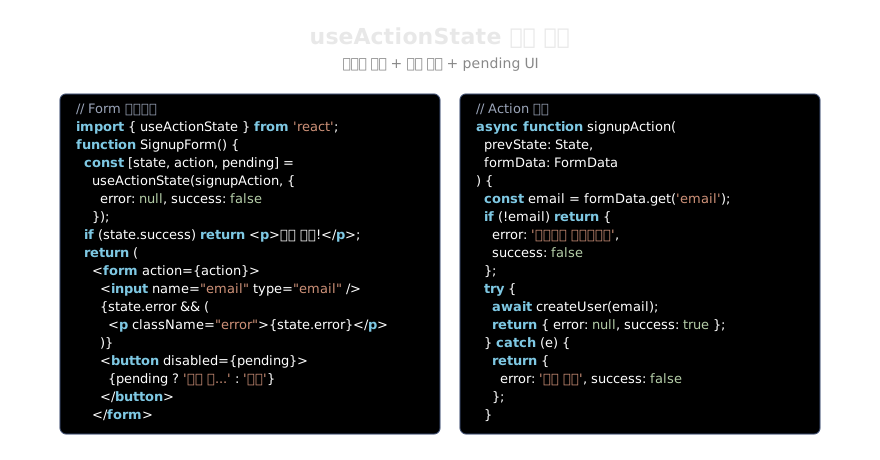
유효성 검사와 에러 표시가 포함된 전형적인 폼을 구현해 보자.
import { useActionState } from 'react';

type FormState = {
  error: string | null;
  success: boolean;
};

const initialState: FormState = { error: null, success: false };

async function signupAction(
  prevState: FormState,
  formData: FormData
): Promise<FormState> {
  const email = formData.get('email') as string;

  if (!email || !email.includes('@')) {
    return { error: '유효한 이메일을 입력하세요', success: false };
  }

  try {
    await createUser(email);
    return { error: null, success: true };
  } catch (err) {
    return { error: '가입 처리 중 오류가 발생했습니다', success: false };
  }
}

function SignupForm() {
  const [state, action, isPending] = useActionState(signupAction, initialState);

  if (state.success) {
    return <p>가입이 완료되었습니다! 이메일을 확인해주세요.</p>;
  }

  return (
    <form action={action}>
      <input name="email" type="email" placeholder="이메일" required />
      {state.error && <p className="error">{state.error}</p>}
      <button type="submit" disabled={isPending}>
        {isPending ? '처리 중...' : '회원가입'}
      </button>
    </form>
  );
}
prevState 활용 — 누적 처리
prevState를 활용하면 이전 상태를 기반으로 새 상태를 만들 수 있다.
type CountState = { count: number; lastAction: string };

async function incrementAction(
  prevState: CountState,
  formData: FormData
): Promise<CountState> {
  const amount = Number(formData.get('amount')) || 1;
  await delay(500); // 비동기 작업 시뮬레이션
  return {
    count: prevState.count + amount, // 이전 값 기반 누적
    lastAction: `+${amount} 추가됨`,
  };
}

function Counter() {
  const [state, action, isPending] = useActionState(incrementAction, {
    count: 0,
    lastAction: '',
  });

  return (
    <form action={action}>
      <p>현재 카운트: {state.count}</p>
      {state.lastAction && <p>{state.lastAction}</p>}
      <input name="amount" type="number" defaultValue={1} />
      <button type="submit" disabled={isPending}>
        {isPending ? '...' : '증가'}
      </button>
    </form>
  );
}
useActionState vs useState + useTransition
두 방식을 언제 쓸지 선택 기준을 정리하면 다음과 같다.
| 상황 | 권장 |
|---|---|
| form과 함께 사용, 결과 상태가 필요 | useActionState |
| 버튼 클릭 등 form 없는 비동기 | useState + useTransition |
| 에러 메시지를 상태로 관리 | useActionState |
| 폼 제출 후 성공/실패 화면 분기 | useActionState |
여러 필드의 에러 관리
필드별 에러를 관리할 때도 useActionState가 깔끔하다.
type FieldErrors = { email?: string; password?: string };
type RegisterState = { errors: FieldErrors; success: boolean };

async function registerAction(
  prevState: RegisterState,
  formData: FormData
): Promise<RegisterState> {
  const email = formData.get('email') as string;
  const password = formData.get('password') as string;
  const errors: FieldErrors = {};

  if (!email.includes('@')) errors.email = '이메일 형식이 올바르지 않습니다';
  if (password.length < 8) errors.password = '비밀번호는 8자 이상이어야 합니다';

  if (Object.keys(errors).length > 0) {
    return { errors, success: false };
  }

  await registerUser({ email, password });
  return { errors: {}, success: true };
}

function RegisterForm() {
  const [state, action, isPending] = useActionState(registerAction, {
    errors: {},
    success: false,
  });

  return (
    <form action={action}>
      <div>
        <input name="email" type="email" />
        {state.errors.email && <span>{state.errors.email}</span>}
      </div>
      <div>
        <input name="password" type="password" />
        {state.errors.password && <span>{state.errors.password}</span>}
      </div>
      <button disabled={isPending}>가입하기</button>
    </form>
  );
}
Server Actions와의 통합
Next.js처럼 Server Actions를 지원하는 환경에서는 useActionState에 서버 함수를 직접 전달할 수 있다.
// actions/user.ts
'use server';
export async function updateProfile(
  prevState: ProfileState,
  formData: FormData
): Promise<ProfileState> {
  const name = formData.get('name') as string;
  await db.user.update({ name });
  return { message: '프로필이 업데이트됐습니다', error: null };
}

// components/ProfileForm.tsx
'use client';
import { updateProfile } from '../actions/user';

function ProfileForm() {
  const [state, action, isPending] = useActionState(updateProfile, {
    message: '',
    error: null,
  });

  return (
    <form action={action}>
      <input name="name" />
      {state.message && <p className="success">{state.message}</p>}
      {state.error && <p className="error">{state.error}</p>}
      <button disabled={isPending}>저장</button>
    </form>
  );
}useActionState는 React 19에서 폼 처리의 표준 패턴이 될 훅이다. 다음 글에서는 낙관적 업데이트를 위한 useOptimistic을 살펴본다.
지난 글: React 19 Actions — 폼과 비동기 처리의 새로운 방식
다음 글: useOptimistic으로 낙관적 UI 업데이트 구현하기
읽어주셔서 감사합니다. 😊
PALDYN / ARTICLE AI
글의 개념, 수식, 코드에 대해 물어보세요.
질문과 관련된 문단을 골라 답변의 문맥으로 사용합니다.생각 중 · 0초